

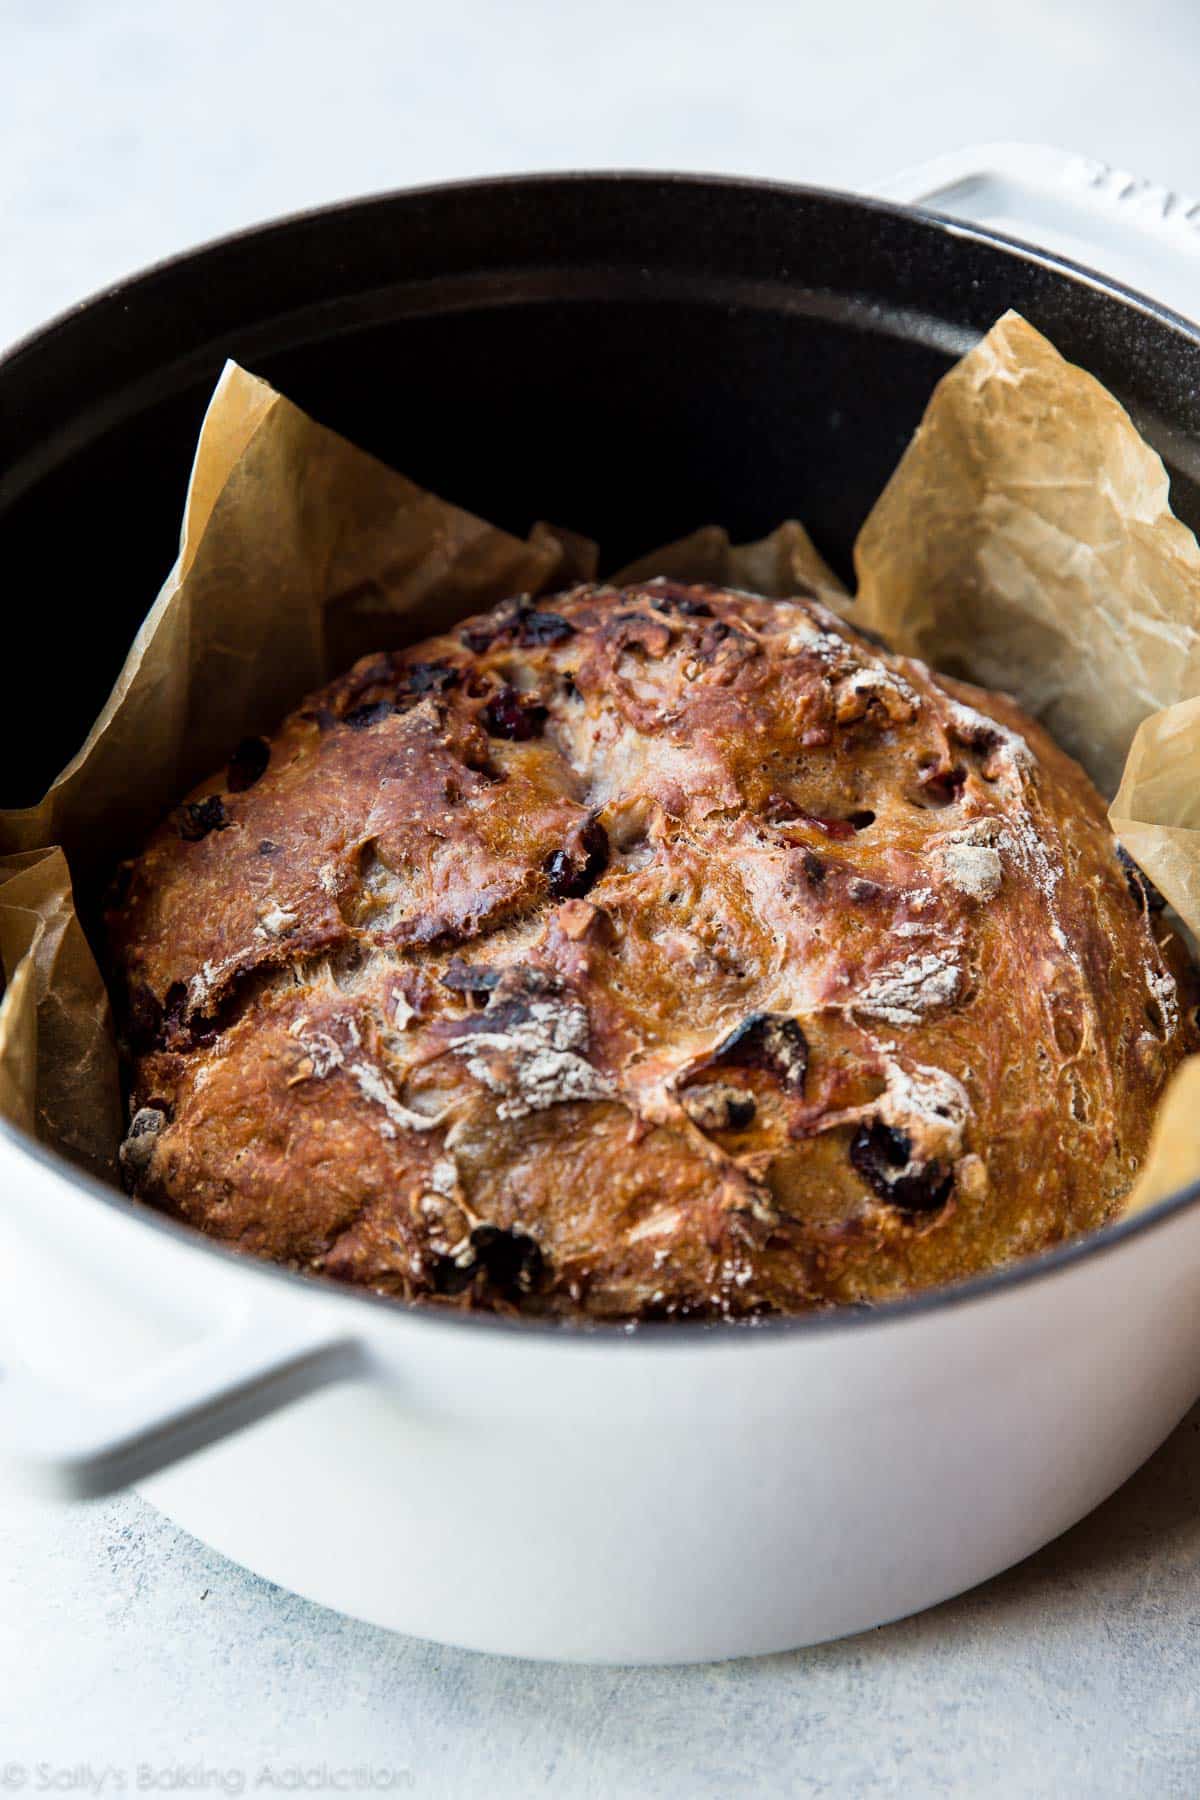
Yeasted bread has by no means been simpler. This easy technique produces probably the most stunning and crusty cranberry nut no-knead bread with little or no hands-on work! For those who’re new to working with yeast, reference my Baking with Yeast Information for solutions to frequent yeast FAQs.
I initially printed this recipe in 2017 and have since added new photographs and some extra success ideas.

“Home made bread” and “simple” are phrases that don’t sometimes go hand-in-hand. While you consider selfmade bread, you suppose tough, proper? This recipe, nonetheless, will utterly change that thought. I notice that’s a fairly large promise, however I’m assured your notion of selfmade bread will swap from “nope! an excessive amount of work” to “wow, I CAN do that.”
One reader, Kris, commented: “This is a wonderful recipe—bread made simple. Scrumptious bites stuffed with taste from the cranberries and walnuts. Will hold this ceaselessly. ★★★★★”
One other reader, Linda, commented: “This recipe is incredible. The bread had an exquisite crust and nice taste. The directions had been tremendous thorough at explaining every part for a novice bread maker. ★★★★★”
Why You’ll Love This Cranberry Nut No-Knead Bread:
- Simply 7 easy components
- Hardly any hands-on time
- Number of textures: crispy crusty exterior, gentle and chewy inside, and loads of dried cranberries and nuts in each slice
- An egg-free baking recipe and dairy-free recipe
- Tastes unbelievable heat with a swipe of honey butter.

This bread, like my selfmade artisan bread, seeded oat bread, asiago-crusted skillet bread, and olive bread, has all of the bells and whistles of a fresh-from-the-bakery cranberry nut bread, and takes little or no effort. If you’re new to working with yeast, or just feeling a bit lazy, this recipe is for you.
Making this loaf will depart you loads of time to hang around. 😉
Simply 7 Substances for This Cranberry Nut Bread
You don’t want loads of components to make selfmade bread, and also you may already know that for those who’ve tried this sandwich bread recipe. You solely want 7 components to make this bread:
- Flour: Flour provides the bread its construction. You should use all-purpose or bread flour. I sometimes attain for bread flour as a result of it yields a barely chewier bread.
- Salt: Decide up some coarse sea salt; I discover the flavour is missing with common desk salt.
- Yeast: You should use on the spot or lively dry yeast, however I extremely suggest an on the spot (aka “fast rise” or “fast rise” yeast). I all the time use Platinum Yeast by Crimson Star, which is an on the spot yeast with dough improvers. You don’t want a lot right here—only one/2 teaspoon—due to the lengthy rise time.
- Nuts: Walnuts or pecans—baker’s selection!
- Dried Cranberries: I really like the chewy texture of dried cranberries right here. Don’t use recent or frozen cranberries, as a result of this dough is just too moist. Raisins would work too, or strive chopping up dried apricots or dates.
- Water: I usually encourage you to make use of heat liquid with yeast as a result of it helps the yeast work sooner. For this recipe, you need the water to be about 95ºF (35ºC), as a result of we’re encouraging a pleasant sluggish rise to construct taste. An instant-read thermometer takes the guesswork out of this.
- Honey: Honey provides taste and helps give the bread its springy, sponge-like texture.

By the best way, for those who take pleasure in honey in your selfmade bread, you’ll love this no-knead honey oat bread as a result of the flavour actually stands out. The method can also be similar to immediately’s simple bread recipe. And each breads are scrumptious heat or toasted and topped with this simple selfmade honey butter.
Overview: 5 Steps to Make No-Knead Bread
This no-work, no-knead, professional-bread-at-home idea originated with Jim Lahey of Sullivan Avenue Bakery in NYC. It’s all very fundamental components, however his technique is exclusive, which incorporates an 18-hour rise time. 18 hours?! Sure! Don’t be nervous, this 18 hours provides the dough an opportunity to ferment. And the fermentation time requires completely nothing from you. Simply set it in your counter and neglect about it till the subsequent day. We use this identical technique for selfmade English muffins. In each recipes, the magic occurs once you’re not wanting!
Step 1: Stir components collectively. Don’t even escape your mixer.
This will likely be an excellent sticky dough. Keep in mind, do NOT be tempted so as to add extra flour. It is going to follow your fingers. That’s nothing a fast wash can’t repair!


Step 2: Cowl the dough and ignore it.
Let the dough rise at room temperature for 12–18 hours. This recipe may be very forgiving. Any normal-ish room temperature is ok. You’ll know that the dough is completed rising when it has about doubled in dimension and air bubbles have shaped on high. Like this:

Step 3: The dough will nonetheless be tremendous sticky after rising. That’s okay! Utilizing flippantly floured fingers, type the sticky dough right into a ball and place on a big piece of parchment paper. Rating the highest with a pointy knife, kitchen shears, or bread lame, then enable to relaxation for half-hour.


Step 4: Preheat a 5- to 6-quart Dutch oven. You’ll bake the bread in a pre-heated (super-hot!) Dutch oven, which helps type a crusty exterior. For those who don’t have a Dutch oven, you should utilize any oven-safe heavy-duty pot with a lid.
Step 5: Bake for about 35 minutes. For an correct doneness check, the bread is finished when an instant-read thermometer reads the middle of the loaf as 195°F (90°C).

FAQ: Why Bake No-Knead Bread in a Dutch Oven?
Baking the bread with the lid on traps steam contained in the pot, creating that completely crisp crust. A lid is the key to this bread recipe’s success! You gained’t remorse choosing up a Dutch oven.
No Dutch oven? No drawback.
Whereas baking the bread in a Dutch oven is vital to this bread’s texture, you may get round it. As an alternative, place the rounded dough on a parchment paper-lined or generously floured nonstick baking pan. No have to pre-heat the pan such as you do the Dutch oven. Whereas the oven preheats and the scored loaf is resting, boil a kettle of water. After the oven is preheated, place scored dough/baking pan on the middle rack. Then place a shallow steel baking/roasting pan or cast-iron skillet (I normally use a steel 9×13-inch baking pan; don’t use glass) on the underside oven rack. Fastidiously and shortly pour 3–4 cups of boiling water into it, after which shortly shut the oven door to entice the steam inside. The steam helps create a crispier crust. That is precisely how I bake 4-ingredient artisan bread.
Step 6: Take pleasure in a slice of heat, recent bread you gained’t imagine you constructed from scratch.

This flippantly honey-sweetened cranberry nut bread is fabulous for breakfast, toasted with butter or honey butter. Or serve it alongside a charcuterie board with a gentle cheese like brie or goat cheese, or this white cheddar cranberry pecan cheese ball (yum!).
This recipe is delivered to you in partnership with Crimson Star Yeast.

Crusty Cranberry Nut No Knead Bread
Prep Time: 20 minutes
Cook dinner Time: 35 minutes
Complete Time: 20 hours
Yield: 1 loaf; 10-12 servings
Class: Bread
Methodology: Baking
Delicacies: American
Description
Yeasted bread has by no means been simpler. This easy mixing technique produces probably the most stunning and crusty cranberry nut no-knead bread with little or no hands-on work! For those who’re new to working with yeast, reference my Baking with Yeast Information for solutions to frequent yeast FAQs.
Directions
- *No have to grease the bowl, and don’t use a mixer on this step as a result of the dough is just too sticky for a mixer.* In a big bowl utilizing a silicone spatula, stir the primary 5 components collectively. Combine the honey and water collectively, then pour on high. Combine to mix. The dough will likely be very sticky; don’t be tempted so as to add extra flour, you desire a sticky dough. Gently form right into a ball as greatest you may.
- Cowl tightly. Set on the counter at room temperature (truthfully any regular room temperature is ok) and permit to rise for 12–18 hours. The dough will double in dimension, follow the perimeters of the bowl, and should have air bubbles on the floor.
- Flip the dough out onto a flippantly floured work floor and, utilizing flippantly floured fingers, form right into a ball as greatest you may. It doesn’t must be good. Switch the dough to a big piece of parchment paper. (Giant sufficient to suit inside your pot and one that’s protected for top warmth. I exploit this parchment and it’s by no means been a difficulty.) Place the ball of dough + parchment inside a bowl so the dough doesn’t unfold out because it rests. Utilizing a really sharp knife, kitchen shears, or a bread lame, gently rating an X into the highest. Cowl dough flippantly with plastic wrap or a clear kitchen towel and let it relaxation for half-hour.
- Throughout this relaxation, preheat the oven to 475°F (246°C). (Sure, highly regarded!) Place your Dutch oven (with the lid) or heavy-duty pot within the oven for half-hour in order that it’s extraordinarily scorching earlier than the dough is positioned inside. After half-hour, take away the Dutch oven and thoroughly place the dough inside by lifting it up with the parchment paper and inserting all of it—the parchment paper included—contained in the pot. Cowl with the lid.
- Bake for 25 minutes with the lid on. Fastidiously take away the lid and proceed baking for 8–10 extra minutes till the bread is golden brown. Tips on how to check for doneness: Give the nice and cozy bread a light-weight faucet. If it sounds hole, it’s executed. For a extra correct check, the bread is finished when an instant-read thermometer reads the middle of the loaf as 195°F (90°C).
- Take away pot from the oven, fastidiously take away the bread from the pot, and permit to chill on a wire rack for not less than 20 minutes earlier than slicing.
- Cowl and retailer leftover bread at room temperature for as much as 1 week.
Notes
- Make Forward & Freezing Directions: The dough takes as much as 18 hours to rise, so this can be a great recipe to start 1 day forward of time. To freeze, bake and funky the bread, wrap in a layer of plastic wrap, then a layer of aluminum foil, and freeze for as much as 3 months. Thaw within the fridge, after which enable to return to room temperature earlier than serving. You may as well freeze the dough. Combine the dough collectively as instructed in step 1. Wrap the sticky dough in flippantly oiled plastic wrap and place in a freezer-friendly container. Thaw at room temperature, then let it relaxation/rise as instructed in step 2. Proceed with step 3 and the remainder of the recipe.
- Particular Instruments (affiliate hyperlinks): Glass Mixing Bowl | Lodge Forged Iron Dutch Oven or Le Creuset Dutch Oven | Parchment Paper | Bread Lame | Prompt-Learn Thermometer | Cooling Rack
- Dutch Oven: Use a 5- to 6-quart (or bigger) Dutch oven or any massive oven-safe pot with an oven-safe lid. In case your Dutch oven is smaller than 5 quarts, you may halve the recipe (directions stay the identical, simply halve every ingredient) or make the dough as instructed in step 1, form the dough into 2 balls as a substitute of 1 ball, and bake them separately in your smaller Dutch oven. Whereas the 2nd dough waits, flippantly cowl and hold at room temperature. The bake occasions within the recipe above (25 minutes after which 8–10 minutes) will each be a bit shorter for the smaller loaves.
- No Dutch oven? See publish above for different.
- Flour: You should use both bread flour or all-purpose flour right here. Bread flour will produce a barely chewier bread. Be happy to substitute as much as 1 cup (round 130g) of the flour for whole-wheat flour. Don’t use all whole-wheat flour, because the bread will style fairly dense and heavy.
- Yeast: For those who don’t have on the spot yeast, you should utilize lively dry. I’ve by no means had an issue utilizing lively dry yeast on this recipe, and with no different modifications wanted. Works splendidly!
- Cranberries: Dried cranberries (or raisins) are greatest for this moist dough. I don’t suggest frozen or recent cranberries.
- Parchment Paper: In case your parchment paper has a most temperature that’s decrease than the temperature referred to as for within the recipe, bake the bread at that temperature. Bake the bread a bit longer to compensate for the decrease temperature.
- Reference my Baking with Yeast Information for solutions to frequent yeast FAQs.
- Recipe tailored from Crimson Star Yeast, technique initially from Jim Lahey.
